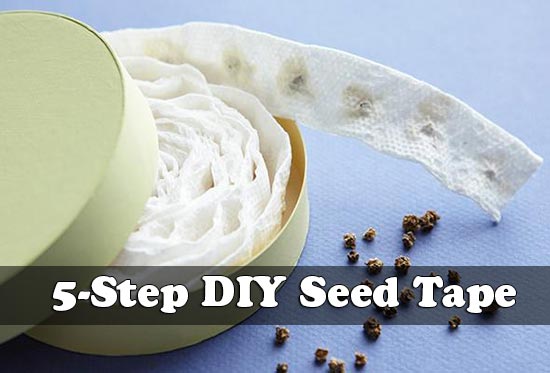
5-Step DIY Seed Tape
Make sure to like Living Green and Frugally on Facebook, Shop at amazon to help support my site and explore our PINTEREST BOARDS for innovative ways you can become self-sufficient.
Gardening enthusiasts often find themselves facing the challenge of seedling thinning, a tedious task that can consume time and energy. However, there’s a simple solution that eliminates this hassle and ensures a tidy, evenly spaced garden: DIY seed tape. These ingenious strips of paper infused with seeds offer a convenient way to sow seeds without the need for meticulous thinning later on.
In this guide, we’ll walk you through a 5-step process to create your own DIY seed tape, offering both a cost-effective alternative to store-bought versions and a thoughtful gift idea for fellow gardeners.
View this post on Instagram
Step 1: Gather Your Materials
To embark on this DIY journey, you’ll need a few basic supplies:
- Seeds of your choice
- Biodegradable paper tape or strips (toilet paper or newspaper works well)
- Flour or cornstarch
- Water
- Small bowl or container
- Measuring spoon
- Marker or pen
Ensure you select seeds suitable for the upcoming planting season and the specific requirements of your garden.
Step 2: Prepare the Seed Paste
Start by creating a simple adhesive paste to attach the seeds to the paper tape. In a small bowl or container, mix equal parts flour or cornstarch with water until you achieve a smooth, glue-like consistency. This paste will securely hold the seeds in place on the paper tape.
View this post on Instagram
Step 3: Attach Seeds to the Paper Tape
Lay out your paper tape strips on a flat surface, such as a table or cutting board. Using a marker or pen, mark evenly spaced intervals along the tape where you’ll place the seeds. Dip your finger or a small brush into the seed paste and dab a small amount onto each marked spot. Then, carefully place a seed onto each dab of paste, ensuring they’re evenly spaced and securely attached.
Step 4: Let the Seed Tape Dry
Allow your DIY seed tape to dry completely before storage or planting. This step ensures that the seed paste sets and adheres the seeds firmly to the paper tape, preventing them from falling off during handling or planting. Depending on the humidity and temperature of your environment, drying times may vary, but overnight drying is generally sufficient.
View this post on Instagram
Step 5: Store or Plant Your Seed Tape
Once dry, your DIY seed tape is ready for storage or immediate planting. To store, simply roll up the seed tape and place it in a cool, dry location until you’re ready to use it. When it’s time to plant, lay out the seed tape in a shallow drill in the soil or place each strip in a separate pot. Cover with a thin layer of soil or compost, water lightly, and await the emergence of your seedlings.
Conclusion
Creating your own DIY seed tape is not only a practical and cost-effective solution for gardeners but also a fun and rewarding activity. By following these five simple steps, you can streamline your planting process, eliminate the need for tedious seedling thinning, and achieve a beautifully spaced garden with minimal effort. Whether you’re a seasoned gardener looking to simplify your routine or a beginner eager to try your hand at gardening, DIY seed tape offers an accessible and enjoyable way to enhance your growing experience. So, gather your materials, get creative, and enjoy the fruits (or rather, the vegetables, flowers, or herbs) of your labor!