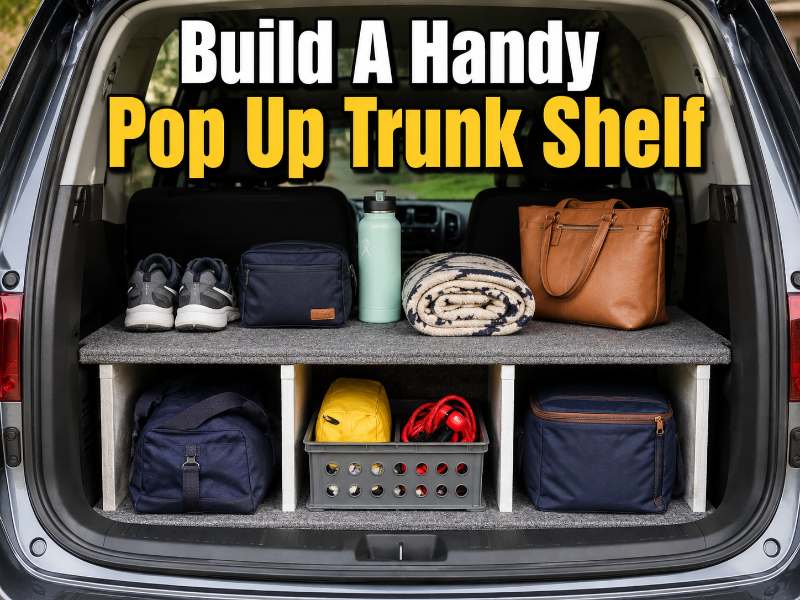
Build A Handy Pop Up Trunk Shelf 🚗🔨
Make sure to like Living Green and Frugally on Facebook, Shop at Amazon to help support my site and explore our PINTEREST BOARDS for innovative ways you can become self-sufficient.
Most car trunks become a dumping ground faster than we like to admit.
One minute it is just a pair of shoes, a shopping bag, and a coat. The next minute you are digging through muddy boots, loose tools, sports gear, emergency supplies, and bags that seem to slide around every time you turn a corner.
That is why this DIY idea is so clever. A handy pop up trunk shelf gives your trunk a second level of storage without permanently changing your car. It can hold wet shoes, shopping, bags, tools, blankets, and travel gear. Even better, it can help hide valuable items underneath so they are not sitting in plain view through the windows.
This is the kind of simple weekend project that makes you wonder why cars do not come with one already built in.
A pop up trunk shelf is especially useful if you have an SUV, estate car, hatchback, van, or family vehicle with a deep trunk space. It creates a flat raised platform that can be lifted up when you need extra storage, then folded away when you want the full trunk open again.
Simple, practical, cheap, and surprisingly useful. What more could you want from a DIY car project? 🚙✨
Why Build A Pop Up Trunk Shelf?
A trunk shelf might not sound exciting at first, but once you have one, it can completely change how you use your car.
Here is why it works so well:
It gives you two levels of storage
Instead of piling everything on top of each other, you can keep items above and below the shelf.
It keeps dirty items separate
Wet shoes, muddy boots, sports gear, dog leads, gardening shoes, or damp coats can sit on the shelf instead of touching clean bags underneath.
It helps hide valuables
Bags, laptops, handbags, tools, and shopping can be placed below the shelf so they are harder to see from outside the car.
It stops items sliding around
A flat shelf with storage sections underneath helps keep things more secure while driving.
It folds away when not needed
The best part is that this project does not have to be permanent. Make it so it lifts, folds, or removes easily.
It is budget-friendly
You can build it using plywood, carpet, hinges, simple brackets, and a few basic tools.
This is not just about having a tidy trunk. It is about making the space work harder for you.
What You Will Need 🧰
The exact materials will depend on the size and shape of your vehicle, but this basic list will work for most DIY trunk shelf builds.
You will need:
Materials:
- Plywood or strong MDF board
- Measuring tape
- Pencil or marker
- Saw or jigsaw
- Sandpaper
- Hinges
- Screws
- Screwdriver or drill
- Carpet, felt, vinyl, or rubber matting
- Spray adhesive or staple gun
- Folding legs, wood supports, or side brackets
- Optional hook and loop strips
- Optional small bungee cords
- Optional edge trim for a neater finish
For most vehicles, plywood is a better choice than thin MDF because it is stronger and handles weight better. You do not need anything overly thick, but it should be sturdy enough to hold shoes, bags, or light boxes without bending.
Step 1: Measure Your Trunk Properly 📏
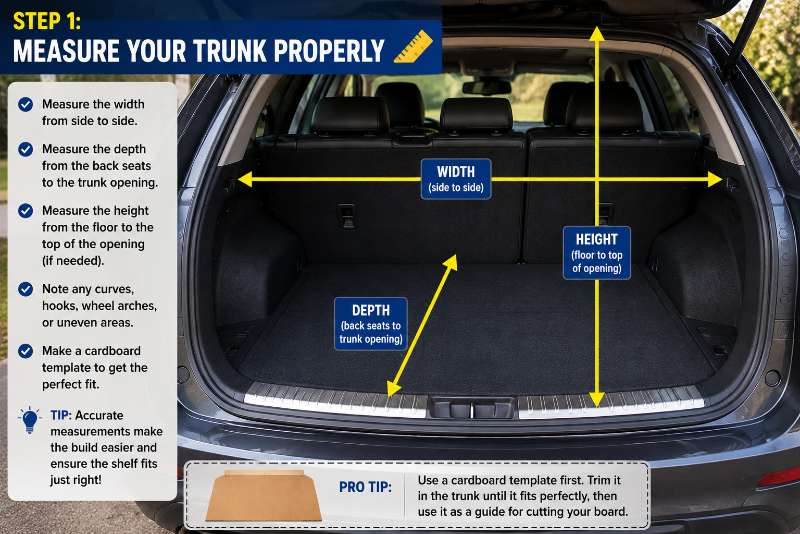
Before you cut anything, measure your trunk carefully.
Measure:
- Width from side to side
- Depth from the back seats to the trunk opening
- Height you want the shelf to sit at
- Any curves, wheel arches, hooks, or uneven trim areas
- Whether the trunk door will still close with the shelf in place
Do not assume your trunk is perfectly square. Many cars have curved side panels, raised edges, or narrow points near the back seats.
A good tip is to make a cardboard template first. Cut a piece of cardboard to the rough size, place it in your trunk, and trim it until it fits. Once you are happy with the shape, use that cardboard as a guide for cutting the wood.
This one step can save you a lot of wasted materials.
Step 2: Cut The Shelf Board 🔨
Once you have your measurements or cardboard template, transfer the shape onto your plywood.
Cut slowly and carefully. If your trunk has rounded corners, you may need to use a jigsaw rather than a straight saw.
After cutting, place the board in the trunk and check the fit.
You want it to sit neatly without forcing it into place. It should not scrape the car interior or stop the trunk from closing.
Once it fits, sand the edges. This makes it safer to handle and helps prevent sharp corners from damaging the car trim.
Step 3: Decide How It Will Pop Up
There are a few simple ways to make your trunk shelf pop up.
Option 1: Folding Legs
Attach folding legs underneath the shelf. When you need the shelf raised, fold the legs down. When you do not need it, fold them flat.
This is one of the easiest methods.
Option 2: Side Supports
Add small wooden support rails or brackets to the sides of the trunk area. The shelf rests on top of them when in use.
This works well if your trunk has flat side sections.
Option 3: Hinged Back Shelf
Attach the shelf near the rear seat area with hinges so it lifts up and down like a flap.
This is handy if you want it to stay attached but still move out of the way.
Option 4: Removable Shelf
Make the shelf completely removable. This is the simplest choice if you do not want to attach anything to the car.
For most people, a removable or folding-leg version is the best starting point because it is simple and does not require drilling into the vehicle.
Step 4: Cover The Shelf For A Finished Look ✨
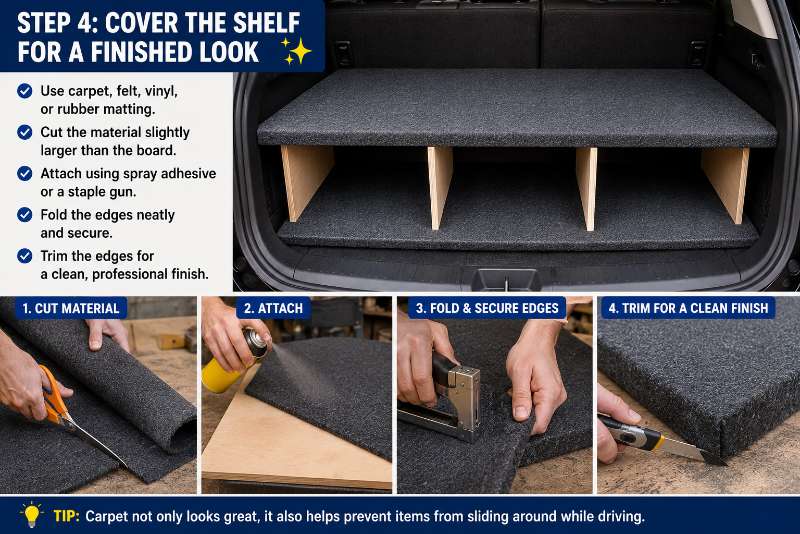
Bare wood works, but covering the shelf makes it look much better and protects your belongings.
You can use:
- Carpet
- Felt
- Rubber matting
- Vinyl
- Heavy-duty fabric
Carpet is a great option because it looks like it belongs in the trunk and helps stop things sliding around.
Cut your material slightly larger than the shelf board, then attach it using spray adhesive, staples, or strong glue. Fold the edges neatly underneath and secure them.
For a cleaner finish, you can add edge trim around the outside.
This step makes the shelf look less homemade and more like a proper car accessory.
Step 5: Add Support Underneath
If your shelf is wide, it may need extra support in the middle.
Add one or two vertical supports underneath so the shelf does not sag. These can be simple pieces of wood cut to the right height.
You can also divide the lower storage area into sections. This gives you little cubby spaces for bags, shoes, emergency kits, tools, or shopping.
For example:
- One section for muddy shoes
- One section for reusable shopping bags
- One section for car emergency supplies
- One section for valuables you want hidden
This is where the project becomes really useful.
Step 6: Test It Before You Load It
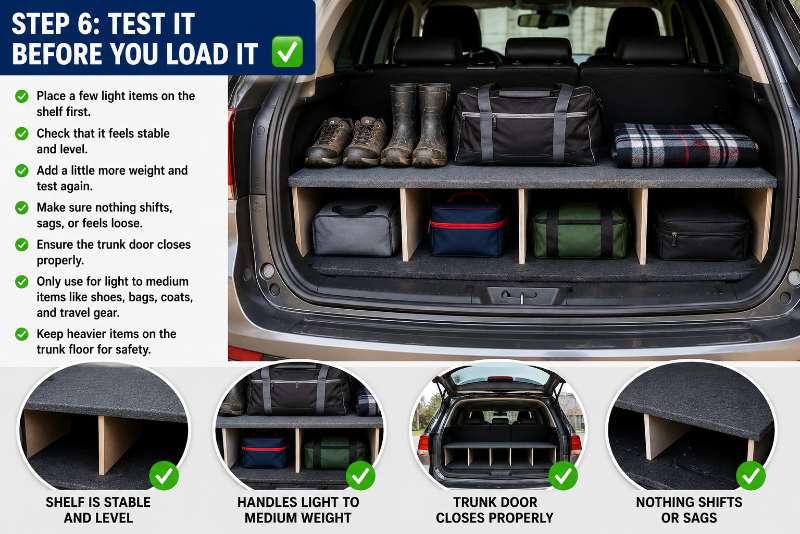
Before you start using the shelf every day, test it carefully.
Place a few light items on top first. Check that it feels stable. Then add a little more weight.
Do not overload it.
This type of shelf is best for light to medium items such as shoes, bags, blankets, coats, groceries, sports gear, and travel items. It is not meant to hold heavy tools, heavy water containers, or anything that could become dangerous while driving.
Also make sure nothing blocks your view if your vehicle relies on rear visibility.
Safety first, always.
Clever Ways To Use Your Pop Up Trunk Shelf 🚙
Once built, there are so many ways to use it.
You can use it for:
- Wet and muddy shoes after walks
- Sports gear after games
- Reusable shopping bags
- Road trip snacks and blankets
- Emergency kit storage
- Hiding handbags or small bags
- Keeping clean clothes away from dirty items
- Organizing camping gear
- Separating food shopping from tools
- Dog walking supplies
It is also brilliant for families. Children’s shoes, school bags, sports kits, coats, and snacks can all have their own place instead of becoming one big mess in the trunk.
Tips To Make It Even Better 💡
Use lightweight materials
You want the shelf strong, but not so heavy that it becomes annoying to move.
Keep it removable
A removable shelf is easier to clean and easier to adjust later.
Add grip underneath
Rubber feet or non-slip pads can stop it sliding.
Use dark fabric
Dark carpet or vinyl hides dirt better.
Make it wipeable
If you often carry muddy shoes or wet gear, rubber matting may be better than fabric.
Do not block access to spare tires or emergency tools
Make sure you can still reach anything important under the trunk floor.
Round the corners
Rounded edges are safer and look neater.
Common Mistakes To Avoid
The biggest mistake is making the shelf too big. If it is too tight, it can damage your car trim or be difficult to remove.
Another mistake is building it too high. If the shelf sits too high, you may lose useful trunk space or stop the trunk door from closing properly.
Also avoid using weak board. Thin board may bend or crack, especially if you place bags or shoes on top regularly.
Finally, do not forget about safety. Anything loose in a car can move during sudden braking. Keep heavier items low and secured.
Common Questions And Answers

Can I build this without drilling into my car?
Yes. The easiest option is to make a removable shelf with folding legs or freestanding supports. That way you do not need to permanently attach anything to the vehicle.
What wood should I use?
Plywood is usually a good choice because it is strong and lightweight. Avoid very thin board unless you only plan to store extremely light items.
How much weight can a pop up trunk shelf hold?
That depends on the wood, supports, and design. For safety, use it for lighter everyday items like shoes, bags, coats, blankets, and groceries rather than heavy loads.
Can I make this for a small car?
Yes, but you will need to measure carefully. A smaller hatchback may need a shorter shelf or one that folds in half.
What should I cover the shelf with?
Carpet looks neat and helps stop things sliding. Rubber matting is easier to clean. Vinyl is a good option if you want something wipeable.
Is this safe for driving?
It can be safe if built properly and used sensibly. Keep heavy items low, secure loose objects, and avoid blocking your rear view.
Can I remove it when I need full trunk space?
Yes. That is one of the best parts of this project. Design it so it lifts out, folds down, or pops away when not needed.
Final Thoughts
Building a handy pop up trunk shelf is one of those DIY projects that is simple, useful, and surprisingly satisfying.
It helps keep muddy shoes away from clean items, gives you hidden storage, stops your trunk from becoming a messy pile, and makes your vehicle feel much more organized.
Best of all, you do not need expensive tools or fancy materials. With a piece of plywood, some covering, basic supports, and careful measuring, you can create a practical trunk shelf that works for shopping trips, road trips, sports gear, dog walks, camping, and everyday family life.
It is a small upgrade that can make a big difference every time you open the trunk. 🚗🔧
Would you use one of these in your car, or would your trunk still somehow end up messy anyway?