

Why Gardeners Are Poking Holes In Water Butts To Save Their Plants 💧🌱
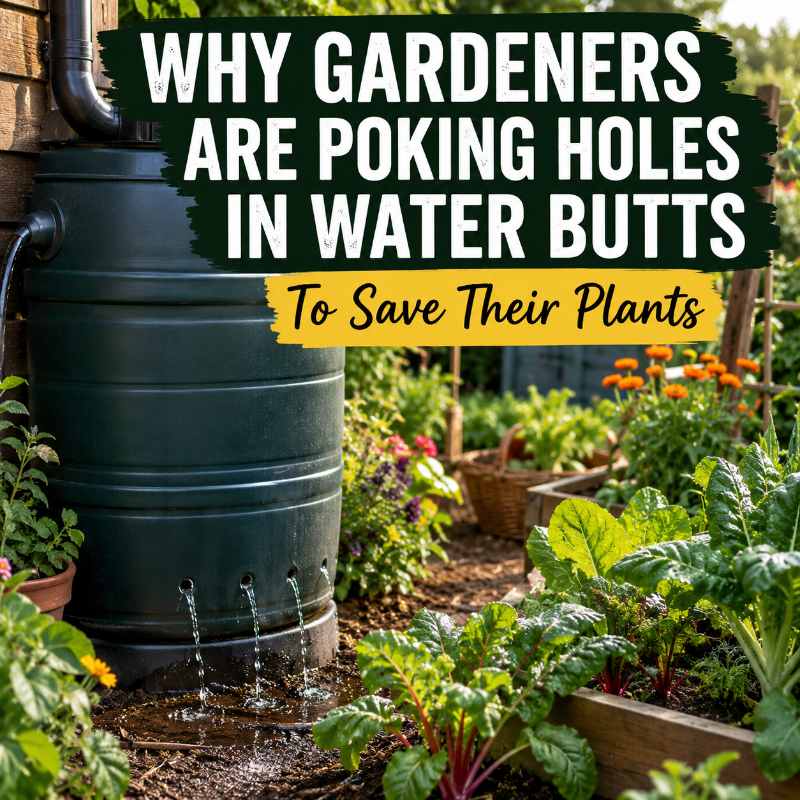
Most gardeners spend half the summer trying to save every drop of rainwater they can. So when someone says, “poke holes in your water butt,” it sounds like the worst gardening advice ever.
But here is the twist…
Some gardeners are doing it on purpose, and it might be one of the simplest water-saving tricks for dry weather. Instead of storing water until you remember to use it, a punctured water butt slowly releases rainwater into the soil, almost like a homemade slow-drip irrigation system.
It is cheap, low-tech, and slightly strange, which is probably why people are talking about it. The RHS listed punctured water butts as one of its 2026 gardening predictions, explaining that small holes can provide a slow flow of water into soil while freeing up space for the next rainfall and reducing mains water use.
And honestly, it makes sense.
With hotter summers, unpredictable rain, water restrictions in some areas, and rising bills, gardeners are looking for smarter ways to keep plants alive without standing outside every evening with a hosepipe.
So, is this clever, crazy, or a bit of both? Let’s dig in.
What Is A Punctured Water Butt? 💦
A punctured water butt is exactly what it sounds like. It is a water butt, barrel, bin, bucket, or large container with tiny holes added near the bottom or side so water slowly seeps out into the surrounding soil.
Instead of holding water for later, it releases it gradually.
Think of it like a giant slow-watering pot for your garden.
The idea is not to let all the water gush out at once. The holes should be small enough that the water trickles slowly over many hours, or even longer depending on the container, hole size, soil type, and how much water is inside.
This can be useful near:
- Vegetable beds
- Fruit trees
- New hedges
- Greenhouse borders
- Raised beds
- Thirsty flower borders
- Young trees
- Drought-prone areas of the garden
It is not about wasting water. It is about putting water where plants can actually use it.
Why This Weird Trick Actually Works 🌿
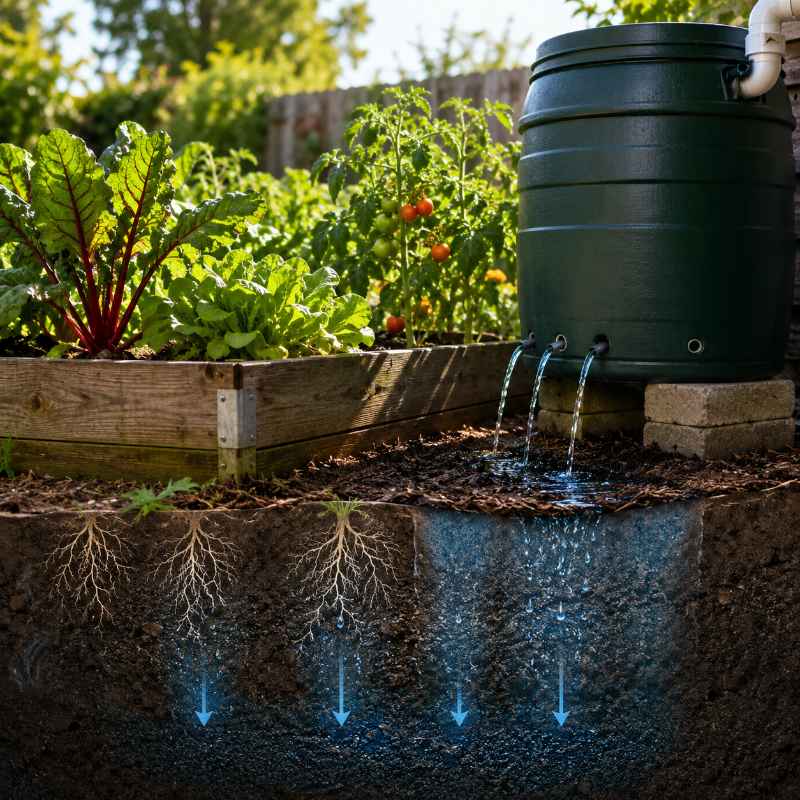
When you water quickly from above, a lot of water can run off, evaporate, or only wet the top layer of soil. This is especially true in dry weather when soil becomes hard and dusty.
A slow-release water butt gives moisture time to soak down deeper.
That matters because deeper watering encourages roots to grow downwards. Plants with deeper roots are usually tougher in dry spells because they are not relying only on the top inch of soil.
This method can also reduce the stop-start watering problem many gardeners have.
You know how it goes…
You forget to water for three days, then soak everything in a panic. Then the soil dries again. Then you repeat the cycle.
Plants do not love that.
Slow watering helps create steadier moisture around the root zone, which can be much better for vegetables, fruit bushes, and young plants trying to get established.
The Big Benefits Of Poking Holes In A Water Butt 🌧️
This trick is getting attention because it solves several problems at once.
It can save mains water
Using stored rainwater instead of tap water is one of the easiest ways to garden more frugally.
It waters slowly and deeply
A slow trickle can soak into the soil better than a fast splash from a watering can.
It frees space for the next rainfall
If the butt empties slowly, it may be able to collect more rain next time instead of sitting full and overflowing.
It can help during dry spells
Plants near the container may get a steady supply of moisture when they need it most.
It is cheap to try
You do not need expensive irrigation equipment. An old container, barrel, or water butt can work.
It suits frugal gardeners
This is the kind of simple, old-fashioned garden hack people love because it uses what you already have.
It is low effort once set up
You fill it, place it, and let gravity do most of the work.
How To Make A Slow-Release Water Butt 🛠️
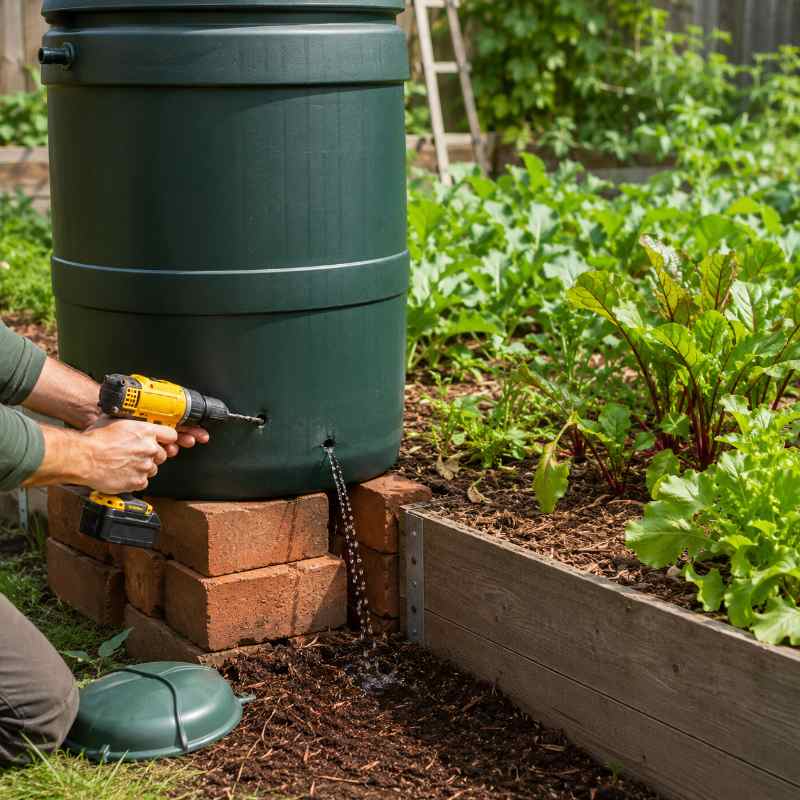
You do not need to overcomplicate this. The key is to start small because you can always make the holes bigger later, but you cannot make them smaller once you have drilled too much.
You Will Need
- A water butt, barrel, old bin, bucket, or sturdy lidded container
- A small drill bit or sharp tool
- Bricks, slabs, or a stable base
- Mesh or lid to keep debris and insects out
- Gravel or mulch around the base
- Water source, ideally rainwater from a roof or downpipe
Step 1: Choose The Right Container
A normal water butt works well, but you can also use an old plastic barrel, food-grade container, or large bucket.
Avoid anything that previously held chemicals, paint, fuel, cleaning products, or anything unsafe. If you are placing it near food crops, be extra careful.
Step 2: Pick The Best Location
Place it close to the plants you want to water.
Good locations include the end of a vegetable bed, beside a fruit tree, at the back of a border, or near a greenhouse. The closer it is to the root zone, the better.
Do not place it where water can seep towards your house, shed base, patio foundations, or neighbour’s property.
Step 3: Make Tiny Holes
Start with one or two very small holes near the bottom side of the container.
A tiny hole is enough to test the flow.
Fill the container with water and watch how quickly it drains. If it empties too fast, the holes are too big or too many. If barely anything happens, you can add another small hole.
The aim is a slow drip, not a leak that floods the ground.
Step 4: Raise It Slightly
Putting the butt on bricks or a stable stand can help with water pressure and prevent the base from sitting in mud.
Make sure it is secure. A full water butt is very heavy and could be dangerous if it tips.
Step 5: Mulch Around The Area
This is the secret that makes the trick work even better.
Add straw, wood chips, compost, leaf mould, grass clippings, or another mulch around the soil where the water is seeping.
Mulch helps hold moisture in the ground for longer and reduces evaporation.
Step 6: Test It For A Few Days
Do not set it up and forget about it straight away.
Check the soil after a few hours and again the next day. Is it damp? Is it soggy? Is water running away from the bed?
Adjust the number of holes, container position, or mulch until it works well.
Where This Trick Works Best 🌻
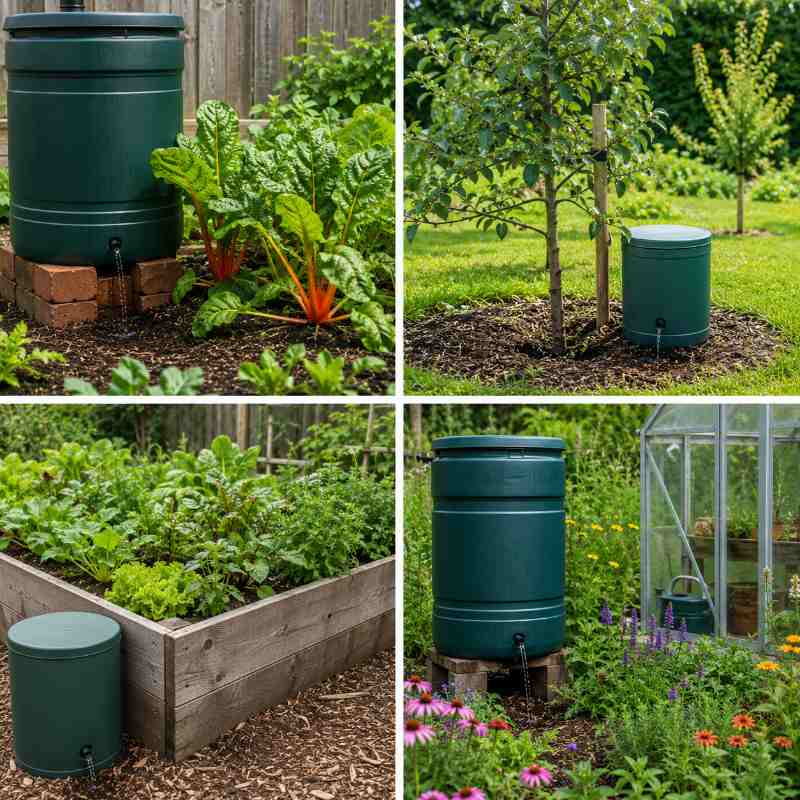
This is not perfect for every garden, but it can be brilliant in the right place.
It works especially well in:
Vegetable gardens
Tomatoes, courgettes, beans, pumpkins, cucumbers, sweetcorn, and squash can all be thirsty in summer.
New trees and shrubs
Young roots need consistent moisture while they establish.
Raised beds
Raised beds can dry out quicker than ground-level beds.
Fruit bushes
Blackcurrants, raspberries, gooseberries, and blueberries often benefit from steady moisture.
Greenhouse borders
Greenhouses dry out quickly, especially during hot spells.
Dry corners of the garden
Some areas always seem to bake in the sun. A slow-release container can help.
Mistakes To Avoid ⚠️
This trick is simple, but there are a few ways to get it wrong.
Making The Holes Too Big
This is the biggest mistake.
Large holes will empty the butt too quickly and may flood one area. Start tiny. Test first.
Putting It Too Close To Buildings
Do not create wet ground near walls, foundations, wooden sheds, fences, or patios. Water should be directed towards plants, not structures.
Forgetting About Mosquitoes
Standing water can attract insects. Use a lid, mesh, or tight cover to stop pests and debris getting inside.
Using Dirty Containers
Do not use containers that held chemicals. For edible crops, stick with food-safe or garden-safe containers.
Letting Soil Become Waterlogged
Plants need water, but they also need air around their roots. If the soil becomes boggy, move the container or reduce the flow.
Thinking It Replaces All Watering
This is a helper, not magic. During extreme heat, pots, seedlings, and greenhouse plants may still need extra watering.
Can You Use Buckets Instead?
Yes, and this is a great budget version.
An old bucket with a lid can become a mini slow-release waterer. Add a tiny hole near the bottom, fill it with water, place it beside a plant, and let it trickle slowly.
This works well for:
- Tomato plants
- Large pots
- Greenhouse cucumbers
- Young trees
- Courgettes
- Pumpkins
- Fruit bushes
You can even bury part of the bucket slightly into the soil so the water seeps closer to the roots.
Just make sure the bucket is stable and covered.
A Smarter Way To Use Rainwater 🌧️
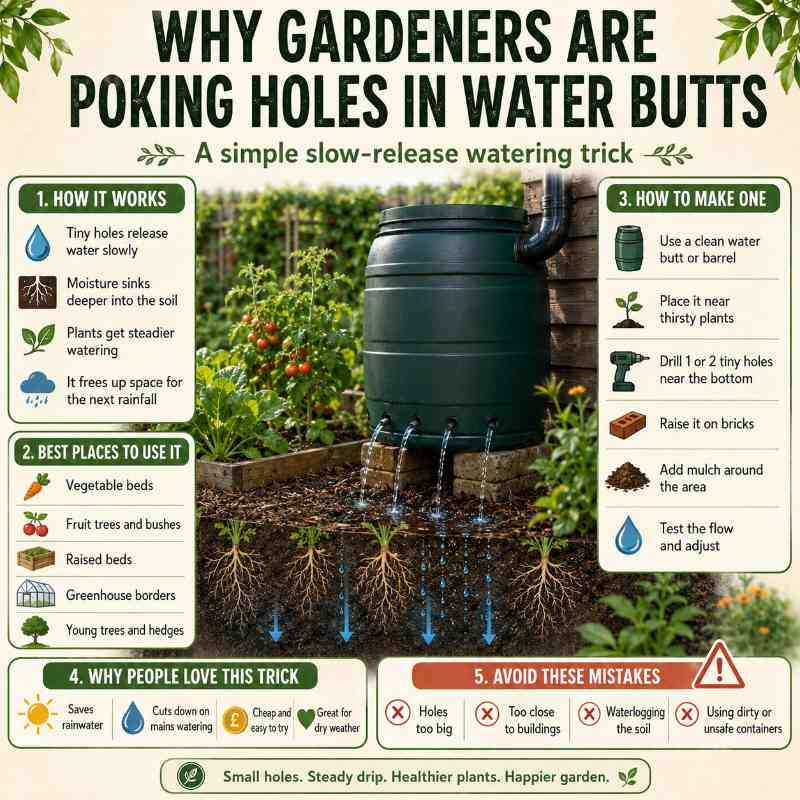
One clever part of this idea is that the water butt does not just sit full after one rainy day.
If it slowly releases water into the soil, it makes space for the next shower. That means less overflow, less waste, and more rainwater actually being used in the garden.
This is why the idea is catching attention alongside other water-wise gardening trends.
Gardeners are realising that the future might not be about watering more. It might be about watering better.
Best Plants To Try This With 🌱
This trick is especially useful for plants that like steady moisture.
Try it near:
- Tomatoes
- Courgettes
- Pumpkins
- Cucumbers
- Beans
- Sweetcorn
- Blackcurrants
- Raspberries
- Newly planted fruit trees
- Young hedges
- Hydrangeas
- Rhubarb
Avoid using it around plants that hate wet feet, such as lavender, rosemary, thyme, and many Mediterranean herbs. Those prefer free-draining soil and can suffer if kept too damp.
Frugal Gardening Tip 💚
Before buying anything new, look around for what you already have.
You might be able to use:
- An old dustbin
- A spare lidded bucket
- A cracked water butt
- A food-grade barrel
- An old storage tub
- A large plant pot lined with plastic
This is the kind of garden hack that does not need to look perfect. It just needs to work.
If you want it to look nicer, hide it behind tall plants, willow screening, a small trellis, or a cluster of pots.
Common Questions About Punctured Water Butts
Do punctured water butts waste water?
Not if they are set up properly. The idea is to release water slowly into soil where plants can use it. The problem comes when the holes are too large or the container is placed where water runs away.
How many holes should I make?
Start with one or two tiny holes. Test the flow before adding more. You want a slow trickle, not a fast drain.
Should the holes be at the bottom or the side?
Side holes near the lower part of the container are often easier to control. Holes right at the base may block with soil or debris if the container sits directly on the ground.
Can I use this for vegetables?
Yes, as long as the container is clean and safe. Avoid containers that held chemicals. Food-grade barrels or clean garden water butts are best for vegetable areas.
Will this attract mosquitoes?
It can if the water is left open. Use a lid or fine mesh to keep insects and leaves out.
Can I connect it to a downpipe?
Yes, but make sure you have overflow control and the butt is stable. A full water butt is very heavy, especially when connected to roof runoff.
Does it work in clay soil?
It can, but be careful. Clay holds water for longer, so you may need fewer holes and slower flow to avoid waterlogging.
Does it work in sandy soil?
Yes, but sandy soil drains quickly. Mulch is especially useful because it helps hold the moisture in place for longer.
Final Thoughts 🌿
Poking holes in a water butt sounds wrong at first. It goes against everything we think about saving rainwater.
But when you look closer, it is actually a clever little trick.
Instead of storing water and forgetting to use it, you are letting it seep slowly into the soil where plants need it. It can help during dry spells, reduce reliance on tap water, make use of rainfall, and give thirsty plants a steadier supply of moisture.
It is not perfect for every garden, and it needs testing before you fully rely on it. But for frugal gardeners, homesteaders, allotment growers, and anyone trying to save water, this is definitely one to try.
Would you poke holes in a water butt, or does it still feel completely wrong? I think this one will divide gardeners.