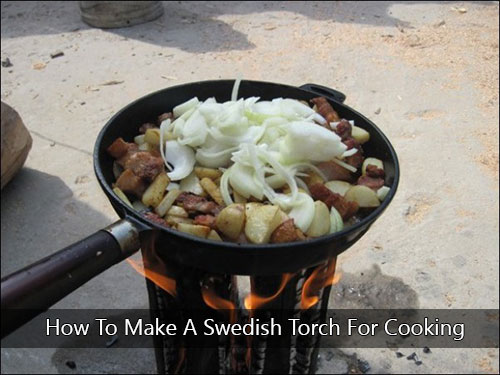
How To Make A Swedish Torch For Cooking

Make sure to like Living Green and Frugally on Facebook, Shop at Amazon to help support my site and explore our PINTEREST BOARDS for innovative ways you can become self-sufficient.
How To Make A Swedish Torch For Cooking
If you’re an outdoor enthusiast or just enjoy cooking over an open flame, the Swedish torch is a fantastic method for creating a controlled and efficient cooking fire. Also known as a Canadian candle or Finnish fire log, this technique involves splitting a log in a specific way to allow for optimal airflow and sustained burning. In this guide, we’ll walk you through the steps to make a Swedish torch and how to use it for cooking delicious meals outdoors.
View this post on Instagram
Materials You’ll Need:
- A Log: Choose a sturdy log that’s about knee-height and roughly the diameter of a large watermelon. Hardwoods like oak, maple, or birch work best as they burn longer and produce less smoke.
- Chainsaw or Saw: To cut the log, you’ll need a chainsaw or a saw capable of making clean, precise cuts.
- Kindling: Gather small sticks, twigs, or wood shavings to help ignite the fire.
- Firestarter: Bring along matches, a lighter, or another fire-starting tool to get the fire going.
Step 1: Selecting and Preparing the Log
Start by choosing a suitable log for your Swedish torch. Look for one that’s relatively straight and free from cracks or rot. Once you’ve found the right log, measure its height and mark the halfway point.
Step 2: Cutting the Log
Using a chainsaw or saw, carefully make several vertical cuts into the log, stopping just before you reach the center point. The number of cuts will depend on the size of the log and how many sections you want to create. For a standard Swedish torch, aim for four to six cuts.
Step 3: Creating Air Vents
Next, turn the log on its side and make several horizontal cuts across the top, perpendicular to the vertical cuts you made earlier. These cuts should penetrate about two-thirds of the way down the log and create small air vents for improved airflow.
Step 4: Igniting the Torch
Place your prepared log on a stable, fireproof surface, such as a metal grate or a ring of rocks. Insert kindling and a firestarter into the center of the log, ensuring they reach the bottom of the cuts. Light the firestarter, and watch as the flames catch hold and begin to spread throughout the log.
Step 5: Cooking Over the Torch
Once the flames have established, you can start cooking over your Swedish torch. Place a grill grate or a sturdy metal surface across the top of the log, allowing it to heat up before adding your food. Whether you’re grilling meat, vegetables, or even toasting marshmallows, the Swedish torch provides a stable and consistent heat source for all your outdoor cooking needs.
View this post on Instagram
Safety Tips:
- Always exercise caution when working with fire, and never leave a lit torch unattended.
- Choose a safe location for your Swedish torch away from any flammable materials, such as dry grass or overhanging branches.
- Keep a bucket of water or a fire extinguisher nearby in case of emergencies.
- Wait until the fire has completely extinguished before disposing of the ashes or moving the log.
Conclusion:
Making a Swedish torch for cooking is a simple yet effective way to enjoy delicious meals outdoors. By following these steps and taking proper safety precautions, you can create a cozy campfire atmosphere while preparing your favorite dishes over an open flame. So gather your supplies, find a scenic spot, and start cooking up a storm with your homemade Swedish torch!