

Crochet Ice Cream Cone Pattern!

Make sure to like Living Green and Frugally on Facebook, Shop at amazon to help support my site and explore our PINTEREST BOARDS for innovative ways you can become self-sufficient.
Crochet Ice Cream Cone Pattern
If you love cute crochet projects, this little crochet ice cream cone is almost too sweet to resist. With a textured waffle-style cone, a soft scoop of ice cream, colourful sprinkles and a tiny cherry on top, it makes a lovely handmade decoration, toy or gift.
The finished ice cream cone is small enough to make from leftover yarn, so it is also a great stash-busting project. Once you understand the basic pattern, you can easily change the colours to make strawberry, vanilla, mint, chocolate or any other flavour you like.
This pattern is suitable for anyone comfortable with basic crochet stitches and working in continuous rounds.
What You Will Need
You do not need much yarn for this project, making it perfect for using up scraps.
Materials
- DK or light worsted weight yarn in tan or light brown for the cone
- Pink yarn for the ice cream scoop
- Red yarn for the cherry
- Small scraps of colourful yarn for sprinkles
- Green yarn for the cherry stem
- 3.5mm crochet hook
- Polyester toy stuffing
- Yarn needle
- Stitch marker
- Scissors
- Optional pins for positioning pieces before sewing
You can use a slightly smaller hook if you naturally crochet loosely. The stitches need to be fairly tight so the stuffing does not show through.
Crochet Abbreviations
This pattern uses US crochet terminology.
- MR = Magic Ring
- SC = Single Crochet
- INC = Increase, work 2 single crochet stitches into one stitch
- DEC = Decrease, crochet 2 stitches together
- SL ST = Slip Stitch
- CH = Chain
- ST/STS = Stitch/Stitches
Unless stated otherwise, work in continuous rounds rather than joining each round.
Place a stitch marker into the first stitch of each round so you always know where your round begins.
Part One: Crochet the Ice Cream Cone
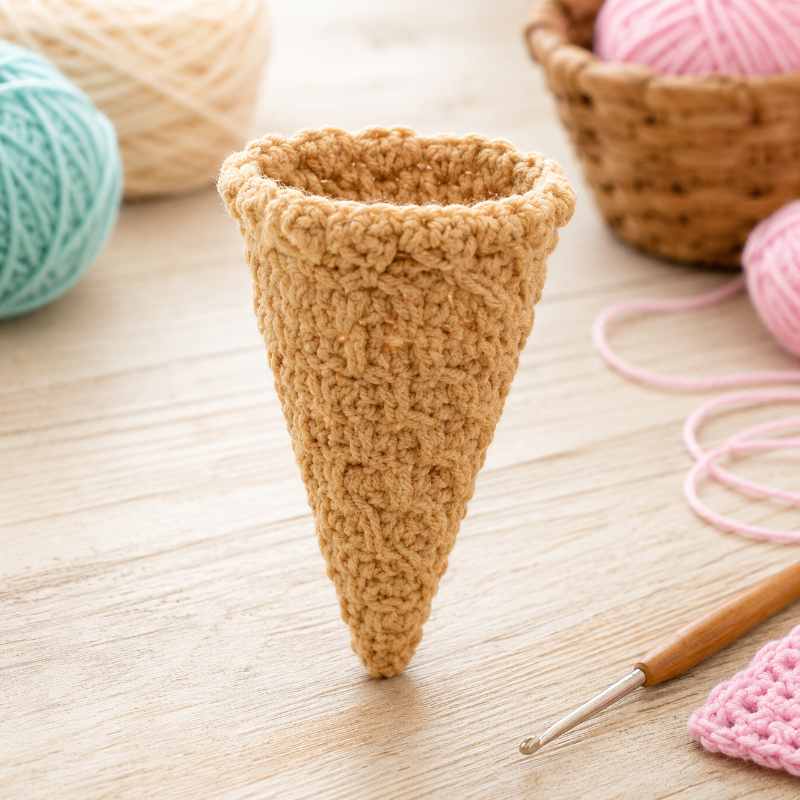
Start with the brown or tan yarn.
The cone is worked from the pointed bottom upwards.
Round 1
Make a magic ring and work:
4 SC into the ring.
Pull the ring closed.
You should have 4 stitches.
Round 2
Work:
INC in every stitch around.
You should now have 8 stitches.
Round 3
Work:
1 SC, INC
Repeat around.
You should have 12 stitches.
Round 4
SC around.
12 stitches.
Round 5
Work:
2 SC, INC
Repeat around.
You should have 16 stitches.
Round 6
SC around.
16 stitches.
Round 7
Work:
3 SC, INC
Repeat around.
You should have 20 stitches.
Round 8
SC around.
20 stitches.
Round 9
Work:
4 SC, INC
Repeat around.
You should have 24 stitches.
Rounds 10-12
SC around each round.
24 stitches.
This should give you a small pointed cone shape.
Do not fasten off yet.
How To Create The Waffle Cone Texture
One of the nicest details on this project is the textured cone.
You have a couple of options.
For the simplest version, crochet the cone normally and then use a yarn needle with slightly darker brown yarn to embroider diagonal lines across the surface.
Work diagonal stitches in one direction first.
Then work another set diagonally in the opposite direction.
The crossing lines create the familiar diamond waffle-cone pattern.
Another option is to alternate working some rounds through the back loops only, which creates subtle raised ridges.
The embroidered version is usually easier and gives you more control over how the finished cone looks.
Stuff The Cone
Add a small amount of polyester stuffing.
Push the stuffing right down into the point using the blunt end of your crochet hook or a pencil.
Continue adding stuffing until the cone holds its shape.
Do not overfill it.
You want the cone to feel firm but still slightly soft.
Leave the top open because the ice cream scoop will be attached here later.
Part Two: Crochet The Ice Cream Scoop
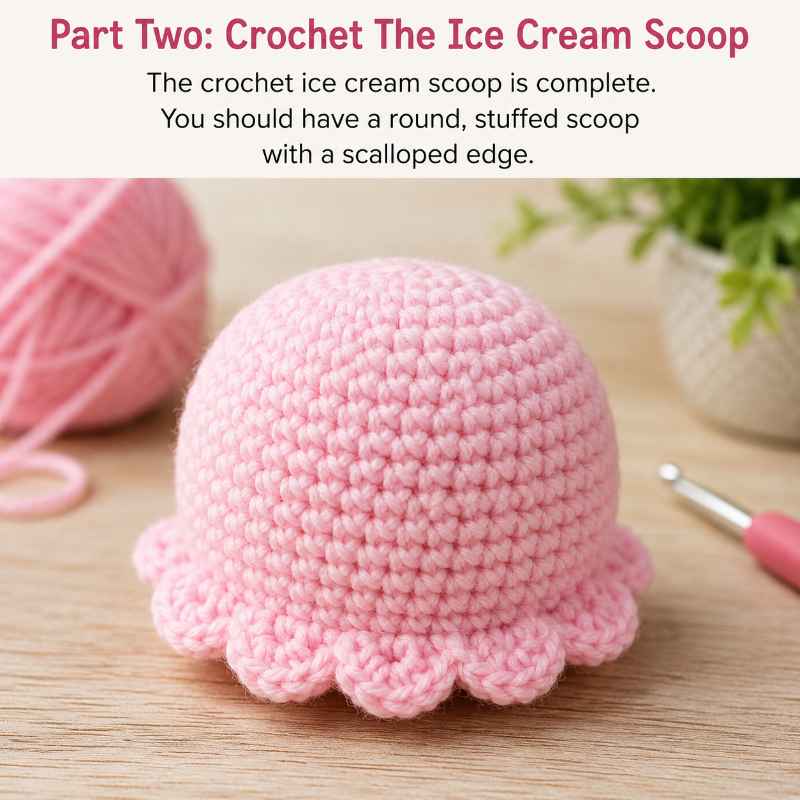
Choose the colour you want for your ice cream.
Pink works beautifully for a strawberry-style scoop, but you could also use:
- Cream for vanilla
- Brown for chocolate
- Pale green for mint
- Yellow for banana
- Purple for blueberry
- Pale orange for peach
Start with a magic ring.
Round 1
Work:
6 SC into MR.
6 stitches.
Round 2
INC in every stitch.
12 stitches.
Round 3
Work:
1 SC, INC
Repeat around.
18 stitches.
Round 4
Work:
2 SC, INC
Repeat around.
24 stitches.
Round 5
Work:
3 SC, INC
Repeat around.
30 stitches.
Rounds 6-9
SC around.
30 stitches.
This creates the rounded top of your ice cream scoop.
Round 10
Work:
3 SC, DEC
Repeat around.
24 stitches.
Round 11
SC around.
24 stitches.
Begin stuffing the scoop.
Add enough filling to make the scoop nicely rounded.
Make The Scalloped Ice Cream Edge
The little scalloped edge where the ice cream meets the cone makes the finished project look much more like a real scoop.
Do not fasten off.
Working around the bottom edge:
SL ST into next stitch.
Then work:
5 DC into the next stitch.
SL ST into the following stitch.
Repeat this pattern around the edge.
This creates little rounded bumps that look like melting or scooped ice cream.
Fasten off and leave a long yarn tail for sewing.
Part Three: Add The Sprinkles
Before attaching the scoop to the cone, add the colourful sprinkles.
Thread a small length of coloured yarn through your yarn needle.
Make tiny straight stitches across the surface of the ice cream.
Use several colours such as:
- Blue
- Yellow
- Purple
- Orange
- Green
- White
Keep the stitches small and place them randomly.
Try pointing some vertically, some horizontally and some diagonally.
This makes them look much more natural.
Tie the yarn securely inside the scoop when finished.
Part Four: Crochet The Cherry
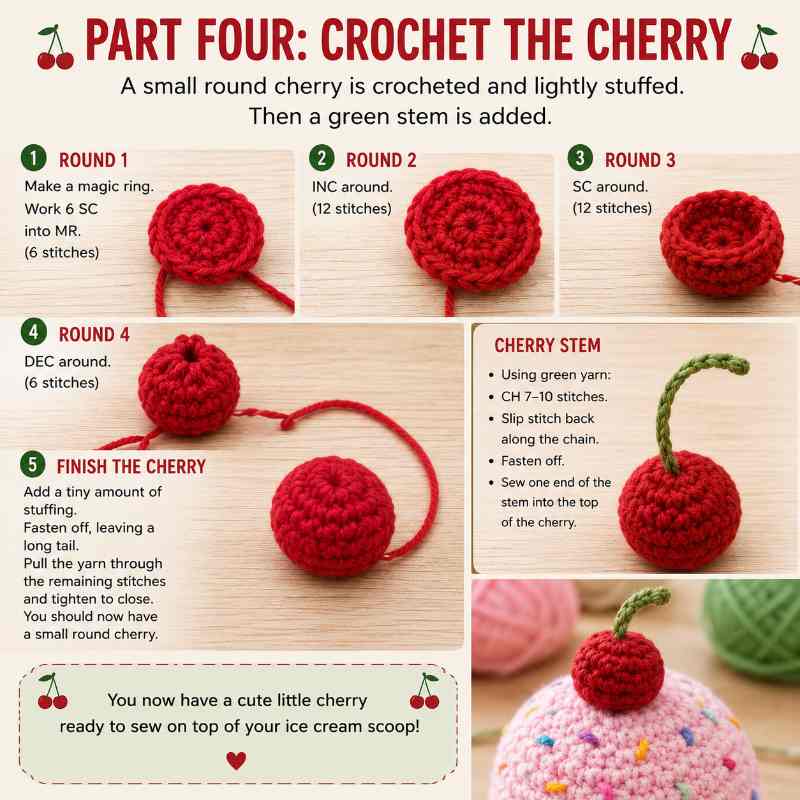
Use red yarn.
Round 1
Make a magic ring.
Work:
6 SC into MR.
Round 2
INC around.
12 stitches.
Round 3
SC around.
12 stitches.
Round 4
Work:
DEC around.
6 stitches.
Add a tiny amount of stuffing.
Fasten off, leaving a long tail.
Pull the yarn through the remaining stitches and tighten to close the opening.
You should now have a small round cherry.
Crochet The Cherry Stem
Using green yarn:
CH 7-10 stitches.
Slip stitch back along the chain.
Fasten off.
Sew one end of the stem into the top of the cherry.
You can bend the stem slightly to give it the curved appearance shown in the finished design.
Assemble Your Crochet Ice Cream Cone
Now all the individual pieces can be joined together.
Place the stuffed ice cream scoop on top of the cone.
The bottom of the scoop should sit slightly over the top edge of the cone so that the scalloped section overlaps it.
Use the long pink yarn tail and a yarn needle to sew the scoop securely to the cone.
Work around the entire edge.
Take your time here because neat assembly makes a huge difference to the finished project.
Once the scoop is attached, position the cherry on top.
Sew the cherry firmly in place.
Hide all loose yarn ends inside the project.
Your little crochet ice cream cone is finished.
Make Different Ice Cream Flavours
Once you have made one, it is very easy to create an entire collection.
Try some of these combinations:
Strawberry Ice Cream
Pink scoop with multicoloured sprinkles and a red cherry.
Vanilla Ice Cream
Cream scoop with rainbow sprinkles.
Chocolate Ice Cream
Brown scoop with cream-coloured sprinkles.
Mint Chocolate Chip
Pale green scoop with tiny dark brown stitches.
Neapolitan
Use pink, cream and brown yarn to create three coloured sections.
Blueberry
Pale purple scoop with darker purple sprinkles.
You could even crochet two or three scoops and stack them on top of each other for an oversized ice cream cone.
What Can You Use A Crochet Ice Cream Cone For?
These little crochet cones can be used for much more than decoration.
They make lovely:
- Children’s pretend-play food
- Nursery decorations
- Birthday decorations
- Party favours
- Bag charms
- Keyrings
- Market stall items
- Handmade gifts
- Summer decorations
- Crochet garlands
- Photography props
For a keyring or bag charm, simply sew a small loop of strong yarn into the top of the cherry before attaching it.
You can then add a keyring fitting or small clip.
Tips For The Best Results
Keep Your Crochet Tight
Amigurumi-style projects look best when the stitches are close together.
If you can see stuffing between the stitches, try using a slightly smaller crochet hook.
Stuff Gradually
Small amounts of stuffing work better than trying to push a large piece inside at once.
Add a little at a time and shape the project as you go.
Use A Stitch Marker
Because the pattern is worked continuously, it can be surprisingly easy to lose track of where a round begins.
Always mark your first stitch.
Save Your Yarn Scraps
The sprinkles require such tiny pieces of yarn that this project is perfect for using up leftovers from previous crochet projects.
Experiment With Colours
There really are no rules.
Make rainbow ice cream, pastel ice cream or even festive red and green Christmas versions.
Approximate Finished Size
Using DK yarn and a 3.5mm hook, the finished crochet ice cream cone should measure approximately:
5-7 inches tall, depending on your crochet tension and how firmly you stuff it.
Using thicker yarn and a larger hook will create a larger ice cream cone.
Using thinner yarn will make a miniature version.
Can Beginners Make This Crochet Ice Cream Cone?
This project is best described as easy to intermediate.
If you already know how to:
- Make a magic ring
- Single crochet
- Increase
- Decrease
- Double crochet
- Work in continuous rounds
you should be able to complete it without too much difficulty.
Even if the finished shape is not perfect the first time, handmade crochet food actually looks especially charming when every piece is slightly different.
Final Thoughts
This Crochet Ice Cream Cone Pattern is a fun little project that can easily be completed using leftover yarn from your craft basket.
The textured cone, fluffy-looking ice cream scoop, colourful sprinkles and tiny cherry give it plenty of personality without making the pattern overly complicated.
Once you have made the basic version, experiment with different yarn colours, flavours and toppings. Before long, you could have an entire handmade crochet ice cream shop.
It is a simple project, uses very little yarn and makes an adorable handmade gift for anyone who loves crochet.