

Bread Cones Recipe

Make sure to like Living Green and Frugally on Facebook, Shop at Amazon to help support my site and explore our PINTEREST BOARDS for innovative ways you can become self-sufficient.
Bread cones are a fun, delicious way to turn a simple sandwich into something everyone wants to try. These golden, hollow bread rolls can be filled with chicken salad, taco meat, scrambled eggs, pizza toppings or almost anything you would normally tuck inside a sandwich.
Although they look impressive, homemade bread cones are surprisingly straightforward. The dough is rolled into ropes, wrapped around cone-shaped moulds and baked until soft inside and lightly crisp outside. This recipe makes approximately eight medium bread cones, perfect for lunches, parties, picnics or a creative family dinner.
What Are Bread Cones?
Bread cones are individual bread rolls baked around cone-shaped moulds. Once the mould is removed, the bread has a hollow centre ready to hold a savoury or sweet filling. They have the convenience of a sandwich but a much more eye-catching shape.
The best bread cones should be sturdy enough to hold a filling without splitting, while remaining soft and tender. Allowing the shaped dough to rise before baking helps create a lighter texture rather than a dense, chewy cone.
Bread Cone Ingredients
- 3 cups plus 2 tablespoons all-purpose flour, approximately 390g
- 2¼ teaspoons instant yeast, one standard 7g packet
- 2 tablespoons granulated sugar
- 1 teaspoon fine salt
- ¾ cup warm milk, approximately 180ml
- 1 large egg
- 2 tablespoons unsalted butter, softened
- 1 tablespoon neutral oil, for the bowl and moulds
For the topping
- 1 egg, beaten with 1 teaspoon water
- Sesame seeds, poppy seeds or dried herbs, optional
The milk should feel comfortably warm, not hot. Liquid that is too hot can damage the yeast, while cold milk will slow the rise considerably.
Equipment and Cone Moulds
You will need a large mixing bowl, measuring equipment, a baking tray, parchment paper and eight oven-safe cone moulds. Metal bread cone moulds are the easiest option because they hold their shape and can be reused.
If you do not have metal moulds, make sturdy cones from several overlapping layers of heavy-duty aluminium foil. You can shape the foil around a clean paper or card template, but remove the paper or card completely before baking. The finished foil mould must be firm enough that it will not collapse under the dough.
How to Make Bread Cones
Step 1: Prepare the dough
Combine the flour, instant yeast, sugar and salt in a large bowl. Keep the salt and yeast on opposite sides of the bowl initially, then stir everything together. Add the warm milk, egg and softened butter.
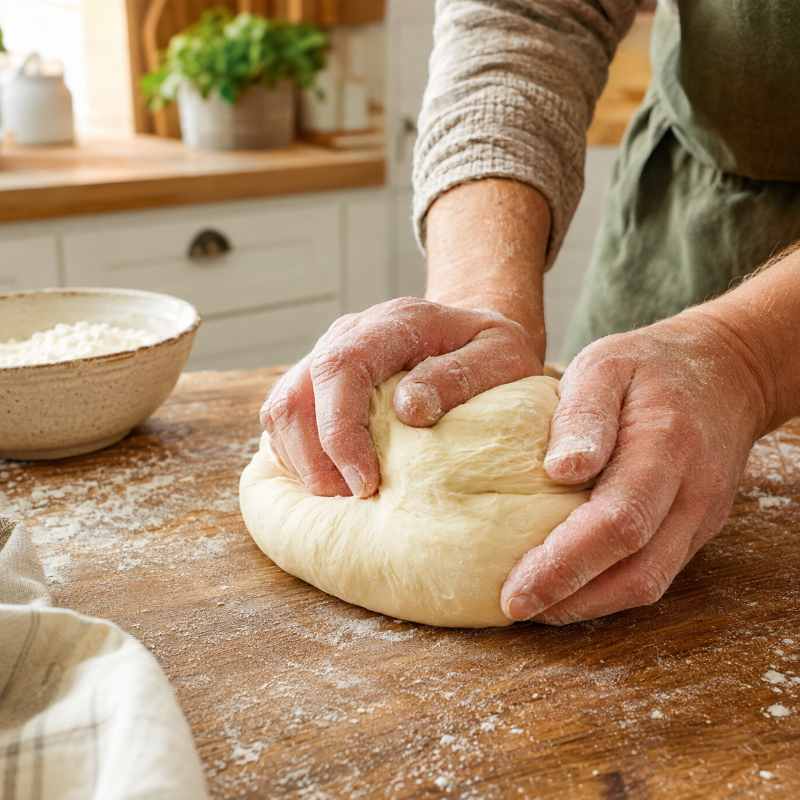
Mix until a rough dough forms. Knead by hand on a lightly floured surface for eight to ten minutes, or use a stand mixer with a dough hook for approximately six minutes. The finished dough should be smooth, elastic and slightly tacky, but it should not stick heavily to your hands.
Step 2: Let the dough rise
Place the dough in a lightly oiled bowl and turn it once to coat the surface. Cover the bowl with a clean kitchen towel or reusable cover. Leave it in a warm, draught-free place for 60 to 90 minutes, or until roughly doubled in size.
Rising time will depend on the temperature of your kitchen. Judge the dough by its size and texture rather than relying only on the clock.
Step 3: Shape the dough
Line a baking tray with parchment paper and lightly grease the outside of each cone mould. Gently press the air from the risen dough, then divide it into eight equal portions.
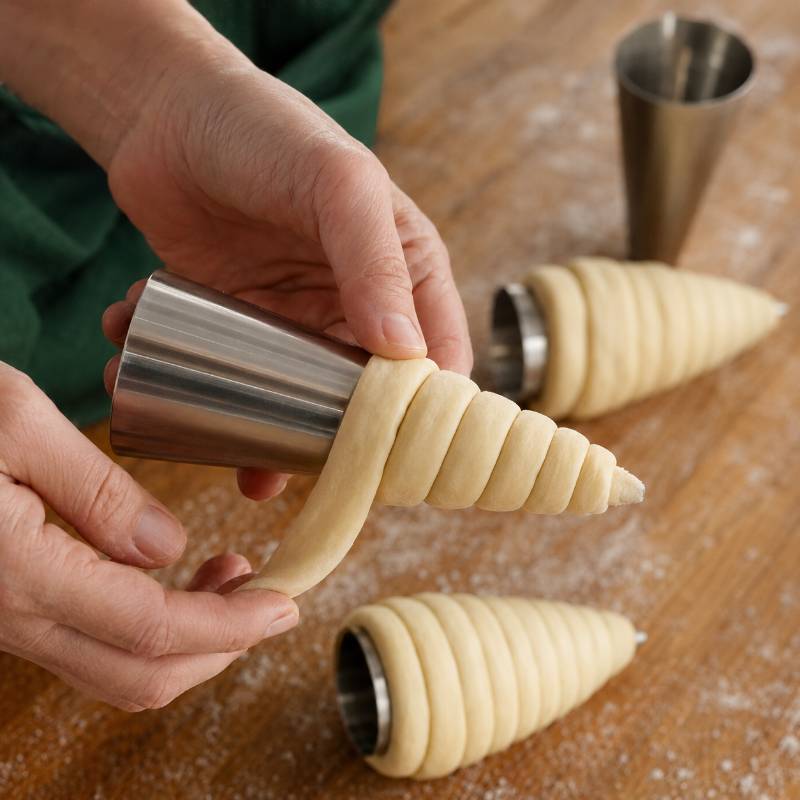
Roll each portion into a rope approximately 20 to 24 inches long. Begin at the pointed end of a mould and wind the dough upwards in a spiral. Slightly overlap each turn so there are no gaps where the filling could escape. Pinch the final end securely against the previous layer.
Step 4: Complete the second rise
Arrange the wrapped moulds on the prepared tray with the loose ends facing down. Cover loosely and let them rise for another 25 to 35 minutes. Meanwhile, preheat the oven to 375°F or 190°C.
The cones should look slightly puffed after the second rise. Do not wait for them to double completely, as excessive rising can blur the spiral pattern or cause the dough to slide.
Step 5: Bake the bread cones
Brush the exposed dough gently with the egg wash. Sprinkle with sesame seeds, poppy seeds or dried herbs if desired. Bake for 15 to 18 minutes, turning the tray once if your oven browns unevenly.
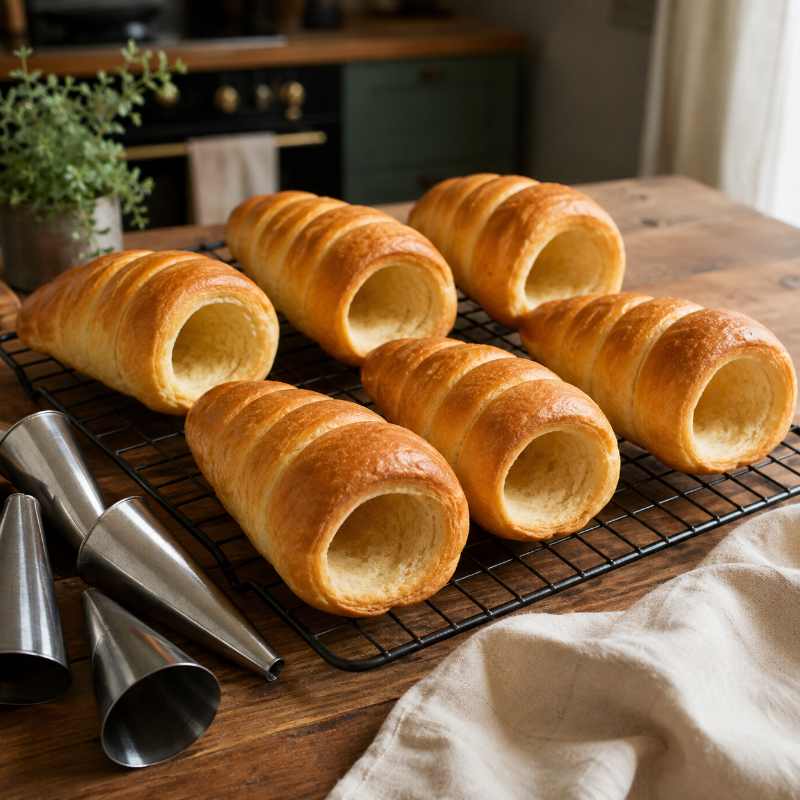
The cones are ready when evenly golden and firm enough to hold their shape. Let them rest on the tray for five minutes, then carefully twist and slide out the moulds. Transfer the bread to a wire rack and cool before adding cold fillings.
Delicious Bread Cone Filling Ideas
Bread cones can be served warm or at room temperature. To protect the bread from moisture, line the inside with a piece of lettuce or a slice of cheese before adding a particularly creamy filling.
- Chicken salad: Chopped chicken, mayonnaise, celery and herbs
- Pizza cone: Thick pizza sauce, cooked toppings and grated mozzarella
- Breakfast cone: Scrambled eggs, cheese and cooked bacon or sausage
- Taco cone: Seasoned minced beef, lettuce, cheese and salsa
- Tuna salad: Well-drained tuna, mayonnaise, sweetcorn and cucumber
- Vegetarian cone: Hummus, roasted vegetables and crumbled feta
- Sweet cone: Whipped cream cheese and fresh berries
Always cook meat, eggs and other fillings fully before placing them inside the cones. If you want to melt cheese, return filled cones to the oven for only a few minutes, supporting them upright in oven-safe cups or a suitable cone holder.
Helpful Tips for Better Bread Cones
- Weigh the dough portions if you want cones of an even size.
- Roll the ropes gradually, allowing them to rest for a minute if they keep shrinking.
- Overlap the dough consistently to prevent weak spots and holes.
- Grease every mould lightly, including homemade foil moulds.
- Cool the bread before using mayonnaise-based or chilled fillings.
- Fill the cones shortly before serving to prevent them becoming soggy.
For softer cones, brush them lightly with melted butter after baking. If you prefer a slightly crisper exterior, leave off the butter and cool them uncovered on a wire rack.
Common Bread Cone Mistakes
Using too much flour
Adding excessive flour makes the bread dry and heavy. The dough should feel slightly tacky after kneading. Add extra flour only a tablespoon at a time if it is genuinely too wet to handle.
Leaving gaps between the spirals
Gaps can expand during baking and allow small pieces of filling to fall out. Overlap each turn slightly and press the connected edges together gently.
Forgetting to grease the moulds
Even non-stick moulds benefit from a thin coating of oil. Without it, the soft inner surface of the bread may tear when you try to remove the mould.
Removing the moulds too quickly
Freshly baked cones are delicate. Allow them to stand for about five minutes, then remove each mould while the bread is still warm. Waiting until completely cold may make a stuck mould more difficult to release.
How to Store and Reheat Bread Cones
Store unfilled bread cones in an airtight container at room temperature for up to two days. Make sure they are completely cool before sealing the container, as trapped steam can soften the crust and encourage spoilage.
To freeze them, place the cooled, unfilled cones in a freezer-safe bag or container and freeze for up to two months. Thaw at room temperature, then warm in a 350°F or 180°C oven for five to eight minutes. Storage times for filled cones depend on the ingredients used, so follow safe refrigeration guidance for the chosen filling.
Frequently Asked Questions
Can I make bread cones without special moulds?
Yes. Make firm moulds from several layers of heavy-duty aluminium foil. Shape the foil carefully and ensure there are no sharp edges that could cut through the dough.
Can I prepare the dough in advance?
Yes. After kneading, cover the dough and let it rise slowly in the refrigerator overnight. Bring it towards room temperature for about 30 minutes before dividing and shaping it.
Why did my dough slide off the mould?
The dough may have been wrapped too loosely, over-proofed or placed with the loose end facing upwards. Wrap it snugly, secure the final end and bake each cone with the seam underneath.
Can I use store-bought pizza dough?
Yes. Chilled pizza dough is a convenient shortcut. Allow it to sit at room temperature until flexible enough to roll, then shape, rise briefly and bake according to its package guidance.
How do I keep filled bread cones upright?
Place them in drinking glasses, small jars, ramekins or a cone-serving stand. Choose a holder that supports the lower half without squeezing the bread.
Can I make whole-wheat bread cones?
You can replace up to half of the all-purpose flour with whole-wheat flour without making major changes. The dough may need one or two additional tablespoons of milk because whole-wheat flour generally absorbs more liquid.
Can bread cones be served cold?
Absolutely. Cooled cones work especially well with chicken salad, tuna, hummus and fresh vegetables. Keep perishable fillings refrigerated until serving.
A Fun Twist on an Everyday Sandwich
Homemade bread cones turn basic bread dough into a memorable meal that can be adapted for breakfast, lunch, dinner or parties. Once you understand how to roll the ropes and overlap the dough, shaping each cone becomes quick and satisfying.
Prepare the bread in advance, keep the fillings separate and let everyone build their own cone when it is time to eat. With a golden crust, soft centre and almost endless filling choices, this is one bread recipe worth adding to your regular collection.