

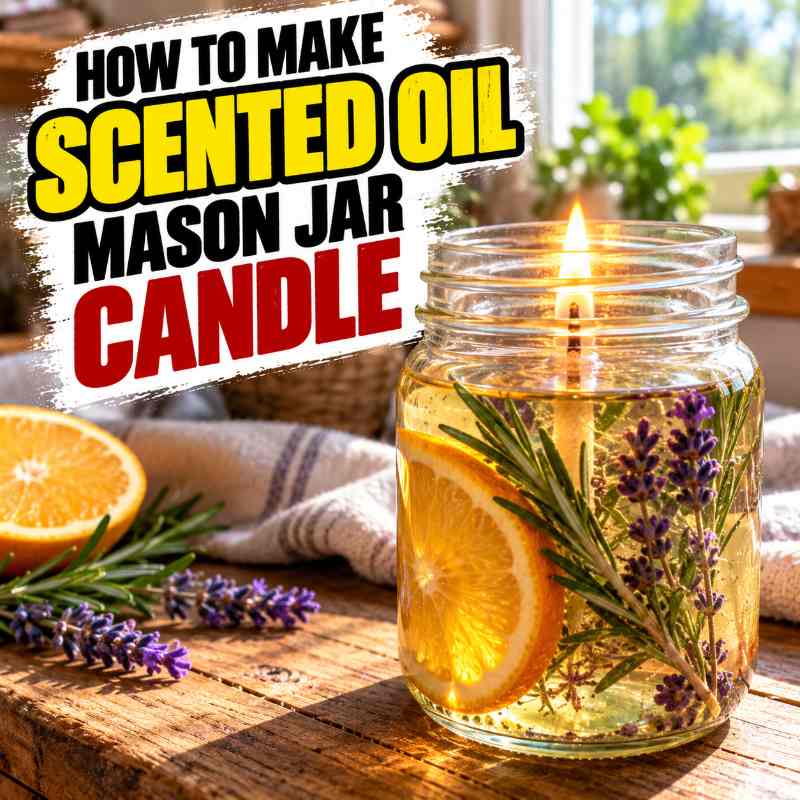
How To Make Scented Oil Mason Jar Candle
Make sure to like Living Green and Frugally on Facebook, Shop at Amazon to help support my site and explore our PINTEREST BOARDS for innovative ways you can become self-sufficient.

A little candlelight can make an ordinary evening feel cozy. And if you love the simple look of a mason jar, a refillable oil lamp can be an appealing craft project.
Before you reach for a jar and a bottle of essential oil, though, there is one detail worth getting right: an oil candle burns liquid fuel. The jar, burner, wick, and fuel need to work together.
This guide explains how to assemble a mason jar oil candle using a purpose-made conversion kit, how to choose a compatible scent, and how to look after it. There is no wax to melt, but there is still an open flame to manage.
Safety first: Only proceed with a kit whose manufacturer explicitly specifies the jar you intend to use and provides filling, lighting, and extinguishing instructions. A lid that happens to fit does not establish that the finished lamp is safe. If you cannot confirm compatibility, choose a complete manufactured oil lamp or a battery-operated mason jar light.
What Is a Scented Oil Mason Jar Candle?
Despite the name, this project is a small oil lamp. A wick draws fuel from the jar to a burner, where the fuel burns to produce the flame.
A wax candle works differently, so ordinary candle-making recipes do not transfer directly to this project. A fragrance oil labeled for wax candles is not automatically suitable for an oil lamp.
The scented version is possible only when the burner manufacturer permits a particular ready-made scented lamp fuel. If the instructions specify unscented fuel, use unscented fuel. You can still enjoy the warm light without adding fragrance.
Supplies You Will Need
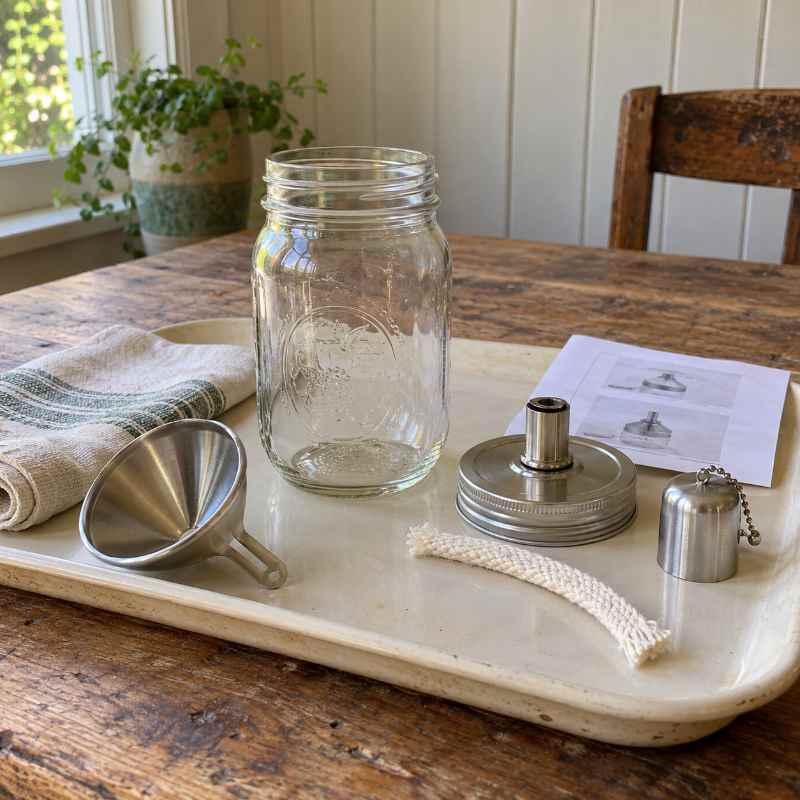
- One compatible mason jar: Use the exact size, mouth type, and jar specification required by your conversion kit.
- One purpose-made mason jar oil-lamp kit: Choose a kit with written instructions, a secure burner assembly, the specified wick, and an appropriate extinguishing method or snuffer.
- Compatible lamp fuel: Follow the kit’s fuel requirements. For a scented version, confirm that the exact scented fuel is permitted.
- Any required chimney or flame guard: Use the matching part if the kit calls for one.
- A small fuel funnel: Keep it separate from utensils used for food.
- A stable, noncombustible, heat-resistant tray: It should comfortably support the lamp.
- A long-reach lighter or long matches.
- Cleanup materials and any protective equipment specified on the fuel label.
- A permanent warning label: Clearly identify the finished jar as a lamp containing fuel, not food or drink.
Project time: Allow time to inspect and assemble the parts, then add the full wick-soaking time stated by the manufacturer. Fuel quantity, wick exposure, and maximum operating time depend on the kit. There is no reliable universal measurement for every mason jar lamp.
Choosing the Jar and Fuel
Start With the Kit Instructions
Choose the lamp kit before choosing the jar. Regular-mouth and wide-mouth jars are different, and the burner may also require a particular jar height or capacity.
Canning glass is intended for food-preservation conditions. That alone does not prove suitability for localized heat from a flame. Do not substitute an antique jar, a drinking glass, or a random food jar for the container specified by the lamp manufacturer.
Keep the Fuel Exactly as Supplied
For this project, do not mix essential oils, perfume, candle fragrance, alcohol, or other additives into lamp fuel. Without manufacturer approval for the exact mixture, you cannot assume it will burn as intended.
Do not substitute gasoline, lighter fluid, rubbing alcohol, or fuel intended for a catalytic fragrance lamp. Cooking oil is also not a universal replacement: a burner designed for one fuel may not operate properly with another.
Check where both the lamp and fuel may be used. An outdoor-only torch fuel does not become suitable for indoor use because you pour it into a smaller jar.
How To Make Scented Oil Mason Jar Candle
Step 1: Prepare Your Work Area
Work on a level surface away from ignition sources, children, and pets. Leave the lighter aside until filling is finished and the fuel bottle has been closed and put away.
Read the kit instructions and fuel label completely. Find the maximum fill level, wick setting, soaking time, location restrictions, and extinguishing method before starting.
Step 2: Inspect and Clean the Jar
Check the glass and rim for cracks, chips, and damage. Reject a damaged jar rather than trying to hide or repair the problem.
Clean the compatible jar as directed and let it dry completely. Check that the burner and any supplied seals or fittings are also undamaged.
Step 3: Assemble the Burner and Wick
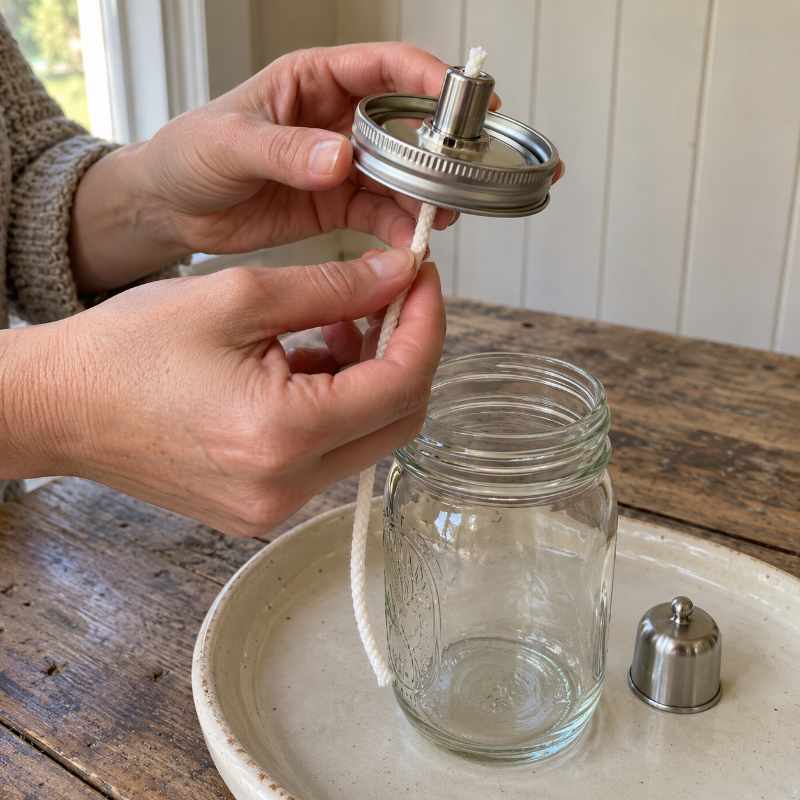
Fit the supplied wick and burner exactly as shown in the kit instructions. The wick needs to be the correct type and size, securely held in its intended position.
Do not replace the assembly with a drilled canning lid and a loose piece of string. Do not add glue, sealant, extra holes, or homemade fittings unless the manufacturer specifically requires them.
Set the exposed wick to the manufacturer’s measurement. More exposed wick can produce an excessive flame, so resist the temptation to pull it higher for brighter light.
Step 4: Add the Approved Fuel
With everything unlit and cool, use the dedicated funnel to fill the jar to the kit’s stated limit. Do not fill to the brim or estimate the level from a photograph.
Keep dried flowers, herbs, citrus slices, spices, stones, glitter, and other decorations out of the reservoir. This project uses only the specified fuel and lamp components.
Close the fuel bottle promptly. Deal with spills according to its label, including disposal of contaminated cleanup materials. Do not light the lamp while fuel remains on its exterior or work surface.
Step 5: Secure the Assembly and Soak the Wick
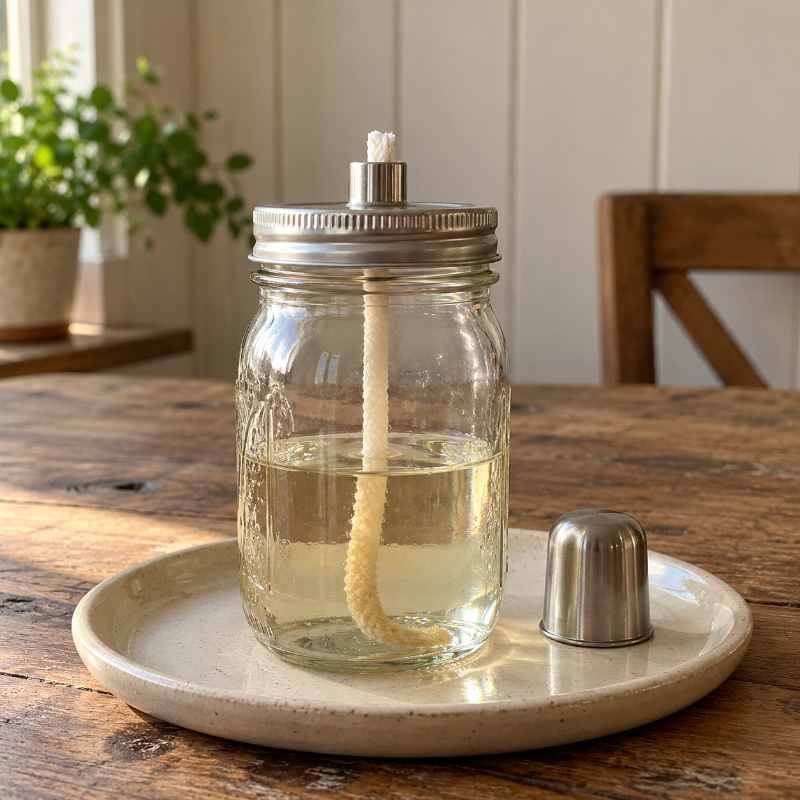
Install the burner, lid assembly, and any required chimney or guard as directed. Check that everything seats properly and the lamp stands securely without leaking.
Allow the wick to absorb fuel for the full specified time. Lighting a dry wick can damage it. If the kit provides no wick-soaking or first-lighting instructions, contact the manufacturer before proceeding.
Step 6: Place and Light the Lamp
Set the lamp on its heat-resistant tray in the location permitted by the instructions. Leave the required clearance around and above it, well away from curtains, shelves, paper, clothing, and decorations.
If indoor use is permitted, follow all ventilation requirements and use it where appropriate working alarms are installed. Keep it away from drafts and anywhere it could be knocked over.
Light it as directed with a long match or lighter. Stay beside it and observe the flame. If it becomes unusually large, smokes persistently, leaks, or behaves unexpectedly, extinguish it using the specified method. Let it cool completely before investigating.
How To Use and Extinguish Your Oil Candle
Keep the burning lamp under continuous adult supervision. Put it out before leaving the room or going to sleep. Do not carry it while burning or while the glass and fittings are hot.
Follow the kit’s operating limits, including its maximum burn duration and minimum remaining fuel level. Do not assume it should burn until the reservoir is empty.
To extinguish it, use the manufacturer’s method, such as its supplied snuffer. Do not improvise by sealing a hot lamp with a canning lid or pouring water into it.
Check that the flame is completely out. Allow every component to cool fully before moving, adjusting, cleaning, or refilling the lamp. Never top up a burning or warm lamp.
If spilled fuel catches fire, do not pick up the jar or pour water onto the burning fuel. Leave the area, alert others, and call emergency services. In the United States, call 911.
Storage and Cleanup
Keep spare fuel in its original labeled container, with the closure secured, following the storage instructions. Never decant it into a drink bottle or another food container.
Store the cool lamp securely, out of sight and reach of children and pets. A screw-on mason jar lid is not automatically a child-resistant closure. Decorative liquid-fuel lamps are best avoided in households with children under five.
Label the finished lamp clearly and keep this jar and its funnel dedicated to fuel use. Follow local household hazardous-waste guidance for unwanted fuel. Do not pour it down a drain or onto the ground.
If someone swallows lamp oil: Get poison-control advice immediately, even if they seem well. Do not induce vomiting. In the United States, call Poison Control at 1-800-222-1222. Call 911 immediately for trouble breathing, collapse, seizures, or inability to wake the person. Keep the original fuel container available for identification.
Common Mistakes to Avoid
- Choosing parts by appearance: Matching threads and a pretty jar are not enough. Confirm the complete combination with the kit manufacturer.
- Adding a few drops of essential oil: A small quantity does not establish compatibility.
- Using the wrong wick: Use the type and size specified for the burner and fuel.
- Decorating near the flame: Skip twine, ribbons, paper labels near hot parts, and anything combustible around the burner.
- Trying to fix smoke while the lamp is hot: Extinguish it and let it cool before making adjustments unless the instructions explicitly provide a safe operating adjustment.
- Treating the first successful lighting as a safety test: A steady flame does not validate an improvised design.
Frequently Asked Questions
Can I Add Lavender or Lemon Essential Oil?
Not as a homemade addition in this project. Use a ready-made scented lamp fuel only when the burner manufacturer explicitly permits that exact product. Otherwise, keep the lamp unscented.
Can I Use Olive Oil Instead of Lamp Oil?
Only in a lamp designed and documented for olive oil. Do not substitute it in a conversion kit that specifies a different fuel.
How Much Wick Should Stick Out?
Use the measurement in your kit’s instructions. Wick designs differ, so copying a number from another lamp tutorial can give the wrong flame size.
How Long Will One Filling Last?
That depends on the fuel, burner, wick setting, and permitted fill quantity. Use the manufacturer’s estimate if provided. A long advertised fuel capacity does not mean the lamp may be left burning unattended.
Why Is My Lamp Smoking?
An incorrect wick setting, unsuitable fuel, or damaged or dirty components may be responsible. Extinguish it, let it cool, and check the instructions. Stop using it if the problem persists.
Can I Give One as a Gift?
Only consider gifting a documented, compatible assembly with its instructions and clear fuel warnings. Explain the approved fuel, extinguishing method, and storage precautions. A flameless jar light is a more practical choice when the recipient has young children or curious pets.
Is There a Flameless Alternative?
Yes. A battery-operated LED candle inside a mason jar gives a similar cozy glow. Follow the light’s instructions and keep any button batteries securely away from children.
A Cozy Project Worth Getting Right
The appeal of a mason jar oil candle is its simplicity: clear glass, warm light, and a container you can refill. Keep that simplicity in the build, too. Use compatible components, the specified fuel, and no decorative extras inside the jar.
If your kit permits scented fuel, you can enjoy that version within its instructions. If it does not, an unscented lamp still makes a lovely addition to a quiet evening. Choose the setup you can use confidently, stay with it while it burns, and let it cool before putting it away.