

Beginners Guide To Using A Pressure Canner
Make sure to like Living Green and Frugally on Facebook, Shop at Amazon to help support my site and explore our PINTEREST BOARDS for innovative ways you can become self-sufficient.
If you have ever looked at a pressure canner and thought, “There is no way I’m using that thing!”, you are definitely not alone.
The heavy lid, hissing steam, pressure gauge and unfamiliar controls can make pressure canning look much more complicated than it actually is.
Once you understand the basic routine, however, it becomes much easier. A pressure canner allows you to safely preserve foods such as vegetables, meat, poultry, stocks and certain soups that cannot safely be processed using an ordinary boiling-water bath.
The most important thing to remember is simple:
Pressure canning is not a place to experiment. Always use a current, tested recipe and follow the correct processing time and pressure for your altitude.
If you are completely new to home food preservation, you may also want to start with our New to Canning?: Complete Newbie to a Confident Canner guide for an overview of the different canning methods.
🫙 What Is Pressure Canning?
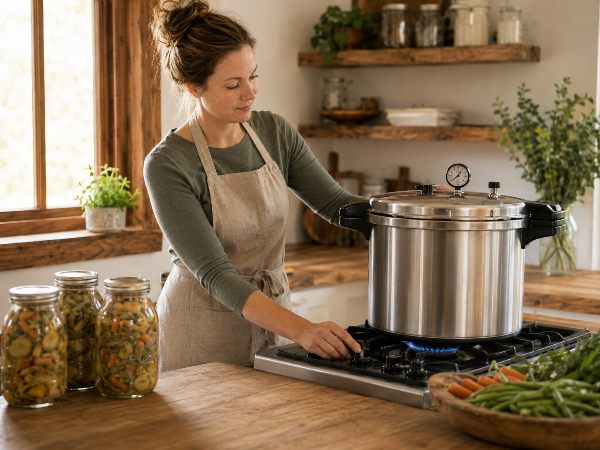
Pressure canning uses a specially designed canner that traps steam under pressure.
This allows the temperature inside the canner to rise above the normal boiling point of water. That extra heat is necessary when preserving low-acid foods such as vegetables, meat, poultry and seafood.
Pressure canning is the recommended home-canning method for low-acid foods because these foods can support the growth of Clostridium botulinum when improperly processed.
Foods commonly pressure canned include:
- Green beans
- Carrots
- Corn
- Peas
- Potatoes
- Meat
- Poultry
- Seafood
- Stocks and broths
- Certain soups
- Some complete meals when using an appropriate tested recipe
High-acid foods such as many jams, jellies, fruits and properly acidified pickles can usually be processed using a boiling-water canner instead.
⚠️ Why Can’t I Just Use A Water-Bath Canner?
This is one of the most important lessons for any new canner.
Boiling water reaches around 212°F or 100°C at sea level. Pressure canning allows the contents of the canner to reach the higher temperatures required to safely process low-acid foods.
That is why simply boiling jars of green beans, meat or other low-acid foods for a little longer is not a safe substitute for pressure canning.
Old family methods may have been used for generations, but that does not necessarily mean they meet current food-safety recommendations.
For pressure canning, always use a current tested process.
🛒 What Do You Need To Start Pressure Canning?
You don’t need dozens of specialist gadgets.
A basic setup includes:
- A proper pressure canner
- A canning rack
- Mason-type home-canning jars
- Suitable canning lids
- Screw bands
- Jar lifter
- Canning funnel
- Bubble-removing tool
- Clean cloths
- Timer
- Tested pressure-canning recipe
Mason-type jars made specifically for home canning are the recommended choice.
Pressure Canner vs Pressure Cooker
This causes a lot of confusion for beginners.
A pressure cooker and pressure canner are not automatically interchangeable.
Small stovetop pressure cookers and electric multi-cookers should not be assumed safe for USDA pressure-canning processes.
The National Center for Home Food Preservation recommends using a pressure canner large enough to hold at least four quart-size jars standing upright on the rack with the lid fitted when using USDA low-acid pressure-canning processes.
So that handy electric pressure cooker you use for dinner might be brilliant for cooking, but that does not make it suitable for pressure canning.
🥕 How To Use A Pressure Canner Step By Step
You do not need to memorise everything immediately.
Think of pressure canning as the same basic sequence repeated with different foods.
Step 1: Choose A Tested Recipe
Do this before preparing the food.
Your recipe determines:
- How the food should be prepared
- Whether it should be hot packed or raw packed
- Correct jar size
- Correct headspace
- Processing time
- Required pressure
- Altitude adjustments
Never randomly change the processing time or use a larger jar than the tested recipe specifies.
Once you become more confident with the basic process, you can explore ideas such as Pressure Canning Whole Meals, but always compare any pressure-canning recipe with current tested preservation guidance before using it.
Step 2: Check Your Pressure Canner
Before every canning session, give your equipment a quick inspection.
Check that:
- The vent pipe is clear
- The lid locks correctly
- The gasket is in good condition if your model uses one
- Safety plugs and valves are undamaged
- The gauge appears to be working correctly
- Jars have no cracks or chips
- Jar rims are smooth and undamaged
Also read the manufacturer’s instructions for your particular pressure canner.
Different models can operate slightly differently.
Step 3: Add Water To The Canner
A pressure canner does not need to be filled with water like a boiling-water canner.
Common pressure-canning instructions use around 2 to 3 inches of water in the bottom of the canner, although you should follow your canner manufacturer’s instructions and the tested recipe you are using.
Place the canning rack in the bottom before loading your jars.
Step 4: Prepare And Fill The Jars
Prepare your food exactly as the tested recipe directs.
Fill each clean jar, making sure you leave the specified amount of headspace.
Remove air bubbles if instructed, adjust the headspace if necessary and wipe the jar rims clean.
Place the lids onto the jars and secure the bands according to the lid manufacturer’s instructions.
Use your jar lifter to place each jar upright on the canning rack.
💨 Step 5: Vent The Pressure Canner
This is one of the most important steps and one beginners sometimes rush.
Lock the canner lid into place.
Leave the vent pipe open or leave the pressure weight off, depending on the design of your canner.
Heat the canner until you have a strong, steady stream of steam coming from the vent.
Once steam is flowing freely, vent the canner continuously for 10 minutes before closing the vent or adding the pressure regulator.
This removes trapped air from the canner. Air trapped inside can reduce the temperature achieved at a given pressure and lead to under-processing.
⏱ Step 6: Bring The Canner Up To Pressure
After the full venting period, close the vent or add your weighted regulator according to your canner’s instructions.
The pressure will begin to rise.
Do not start the processing timer yet.
Wait until the canner reaches the pressure required by your tested recipe.
Only then should you begin timing the processing period.
🔥 Step 7: Maintain The Correct Pressure
Once your canner reaches the correct pressure, adjust the heat to keep the pressure steady.
You may need to make small adjustments to your stove until you learn how your particular canner behaves.
The pressure required depends on factors including:
- Your altitude
- Your type of pressure canner
- The food being canned
- The tested recipe being followed
Altitude is particularly important because pressure requirements change as elevation increases.
What If The Pressure Drops?
Keep watching your gauge or regulator during processing.
If the pressure drops below the pressure required by your tested recipe, you need to bring the canner back up to the required pressure and restart the full processing time.
That might be frustrating if you were nearly finished, but food safety is more important than saving a few minutes.
🧊 Step 8: Let The Pressure Canner Cool Naturally
When the full processing time is complete:
- Turn off the heat.
- Leave the canner where it is.
- Allow the pressure to fall naturally.
- Do not remove the regulator early.
- Do not open the vent early.
- Do not pour cold water over the canner.
- Do not attempt to force the lid open.
Force-cooling a pressure canner can interfere with the tested heating process and may also cause liquid to be forced from the jars.
The canner should cool at room temperature until it is completely depressurised.
Once it has returned to zero pressure, follow your canner manufacturer’s directions for opening it.
Always open the lid away from your face because hot steam can escape.
🫙 Step 9: Remove And Cool Your Jars
Use a jar lifter to carefully lift each jar straight upward.
Place the jars on a towel or cooling rack with some space between them.
Then comes one of the hardest parts of canning:
Leave them alone!
Allow the jars to cool undisturbed at room temperature for 12 to 24 hours. Do not tighten the rings or repeatedly press the centres of the lids while they are cooling.
After cooling, check that every jar has sealed correctly.
For two-piece lid systems, remove the screw bands once the jars are completely cool and check the seals before storing.
Label each jar with the contents and date.
Once you start preserving regularly, jars have a habit of taking over every cupboard in the house. Our guide showing How To Build Your Own Canning Shelves can give you a dedicated place to organise your growing pantry collection.
🚫 8 Pressure Canning Mistakes Beginners Should Avoid
1. Using An Untested Recipe
Not every canning recipe found online, in an old cookbook or passed down through the family has been tested for safe home canning.
2. Guessing The Pressure
Your required pressure can change according to altitude and the type of pressure canner being used.
3. Starting The Timer Too Soon
Processing time begins only when the canner has reached the required pressure.
4. Skipping The 10-Minute Vent
Properly venting the canner removes trapped air and is an essential part of the process.
5. Changing Jar Sizes
Do not automatically use quart jars when a tested recipe only provides instructions for pint jars.
6. Letting The Pressure Drop
You need to maintain at least the required pressure for the entire processing period.
7. Force-Cooling The Canner
Never pour cold water over a pressure canner or deliberately release its pressure early.
8. Using A Small Pressure Cooker
Only use equipment suitable for the tested pressure-canning process you are following.
⭐ What Should A Beginner Pressure Can First?
Keep your first batch simple.
Rather than attempting an enormous batch of complicated soup, start with a single vegetable for which you have a current tested recipe.
The biggest lesson during your first few batches is simply learning how your pressure canner behaves.
You will learn:
- How long it takes to vent
- How quickly pressure rises
- Which stove setting maintains steady pressure
- How the regulator behaves
- How long the canner takes to cool
After two or three successful sessions, the whole process starts feeling much more familiar.
If you want plenty of ideas for future preserving projects, browse our Over 800 Canning Recipes For Winter Storage collection. Treat recipe collections as inspiration and always check pressure-canning recipes against current tested food-preservation guidance before processing low-acid foods.
You can also browse our complete Canning and Preserving section for more food-storage and preserving ideas.
❓ Pressure Canning FAQ
Is pressure canning dangerous?
A proper pressure canner is designed to operate under pressure and includes safety features. It still needs to be maintained and operated according to the manufacturer’s instructions.
Never attempt to force open a pressurised canner or bypass safety equipment.
Do Pressure Canning Jars Need To Be Covered With Water?
No.
Unlike boiling-water canning, the jars are not completely submerged. Pressure canning uses steam under pressure.
Can I Use An Electric Pressure Cooker?
Do not assume an electric multi-cooker is suitable for pressure canning.
USDA pressure-canning processes for low-acid foods were developed for larger pressure canners, and the National Center for Home Food Preservation does not recommend substituting small pressure cookers for those processes.
Why Does Altitude Matter When Pressure Canning?
Atmospheric pressure decreases as elevation increases.
Because of this, you may need to use a higher pressure setting to achieve the temperature required for safe processing.
Always check the altitude adjustment for your tested recipe.
Can I Reduce The Processing Time?
No.
Follow the complete tested processing time for your food, preparation method, jar size and altitude.
What Happens If A Jar Doesn’t Seal?
Allow your jars to cool for 12 to 24 hours before checking their seals.
If a jar has failed to seal, current NCHFP guidance provides specific options for safely reprocessing it within 24 hours when the original batch followed a current tested recipe, or you can refrigerate or freeze the food as appropriate.
🌿 Final Thoughts
Pressure canning looks intimidating when you first see the equipment, but the actual routine is surprisingly logical.
Prepare. Fill. Vent. Pressurise. Process. Cool. Check the seals.
The same basic steps happen every time.
The golden rule is never to guess.
Use a current tested recipe, use a proper pressure canner, know your altitude, maintain the required pressure and allow the canner to cool naturally.
Once you have completed your first few batches, that big metal canner sitting on the stove starts looking far less frightening and much more like one of the most useful tools in your food-preservation cupboard.
⚠️ Important Pressure Canning Safety Note
This article is a beginner’s overview and is not a substitute for the tested processing instructions for the specific food you are canning.
Processing time, jar size, food preparation, pressure and altitude adjustments vary between recipes. Always use current research-tested canning instructions and follow the operating instructions supplied with your pressure canner.